Viewing entries tagged
eggs

Huevos Rancheros

Comment

Huevos Rancheros

I made the simplest huevors rancheros over the weekend. The ingredients used are little, but it is packed with flavor. And hey, who wouldn't want to make this after a night full with drinks? Trust me, it was a hard morning to wake up to, but this plate of goodness really kicked me out of the slum.


Ingredients:

  • 1 28oz crushed tomatoes
  • 1 15oz black beans
  • Blue Corn Tortilla
  • Chipotle in Adobe sauce (I used 2)
  • Eggs (I used 2)
  • Salt and Pepper
  • 1/4 cup of honey
  • 1.3 cups of water
  • 1 clove of garlic
  • Cilantro for garnish.

The black beans are rinsed before heating. This step is optional. I didn't want too much starch so I reconstituted fresh water. The beans are heated up with 1 grated garlic, 2 teaspoons of salt, 2 teaspoons of cumin, 2 cracked black pepper, and then 1/3 cup of water was added with the heat turned off.

The ranchero sauce was made with 1 can of crushed tomatoes and 2 chipotle peppers. If it's too spicy, just use one and remove the seeds. I added about a 1/4 cup of honey and 1 cup of water to thin out the sauce as well as mellowing out the spice. 1 tablespoon of cumin was added with 1 tablespoon of salt. Feel free to add more honey and water to your liking (or another pepper if you want it spicier).

The egg was cooked for 2 minutes on medium high with 1 tablespoon of olive oil. I didn't add any salt since it's already on the chips, beans and sauce.

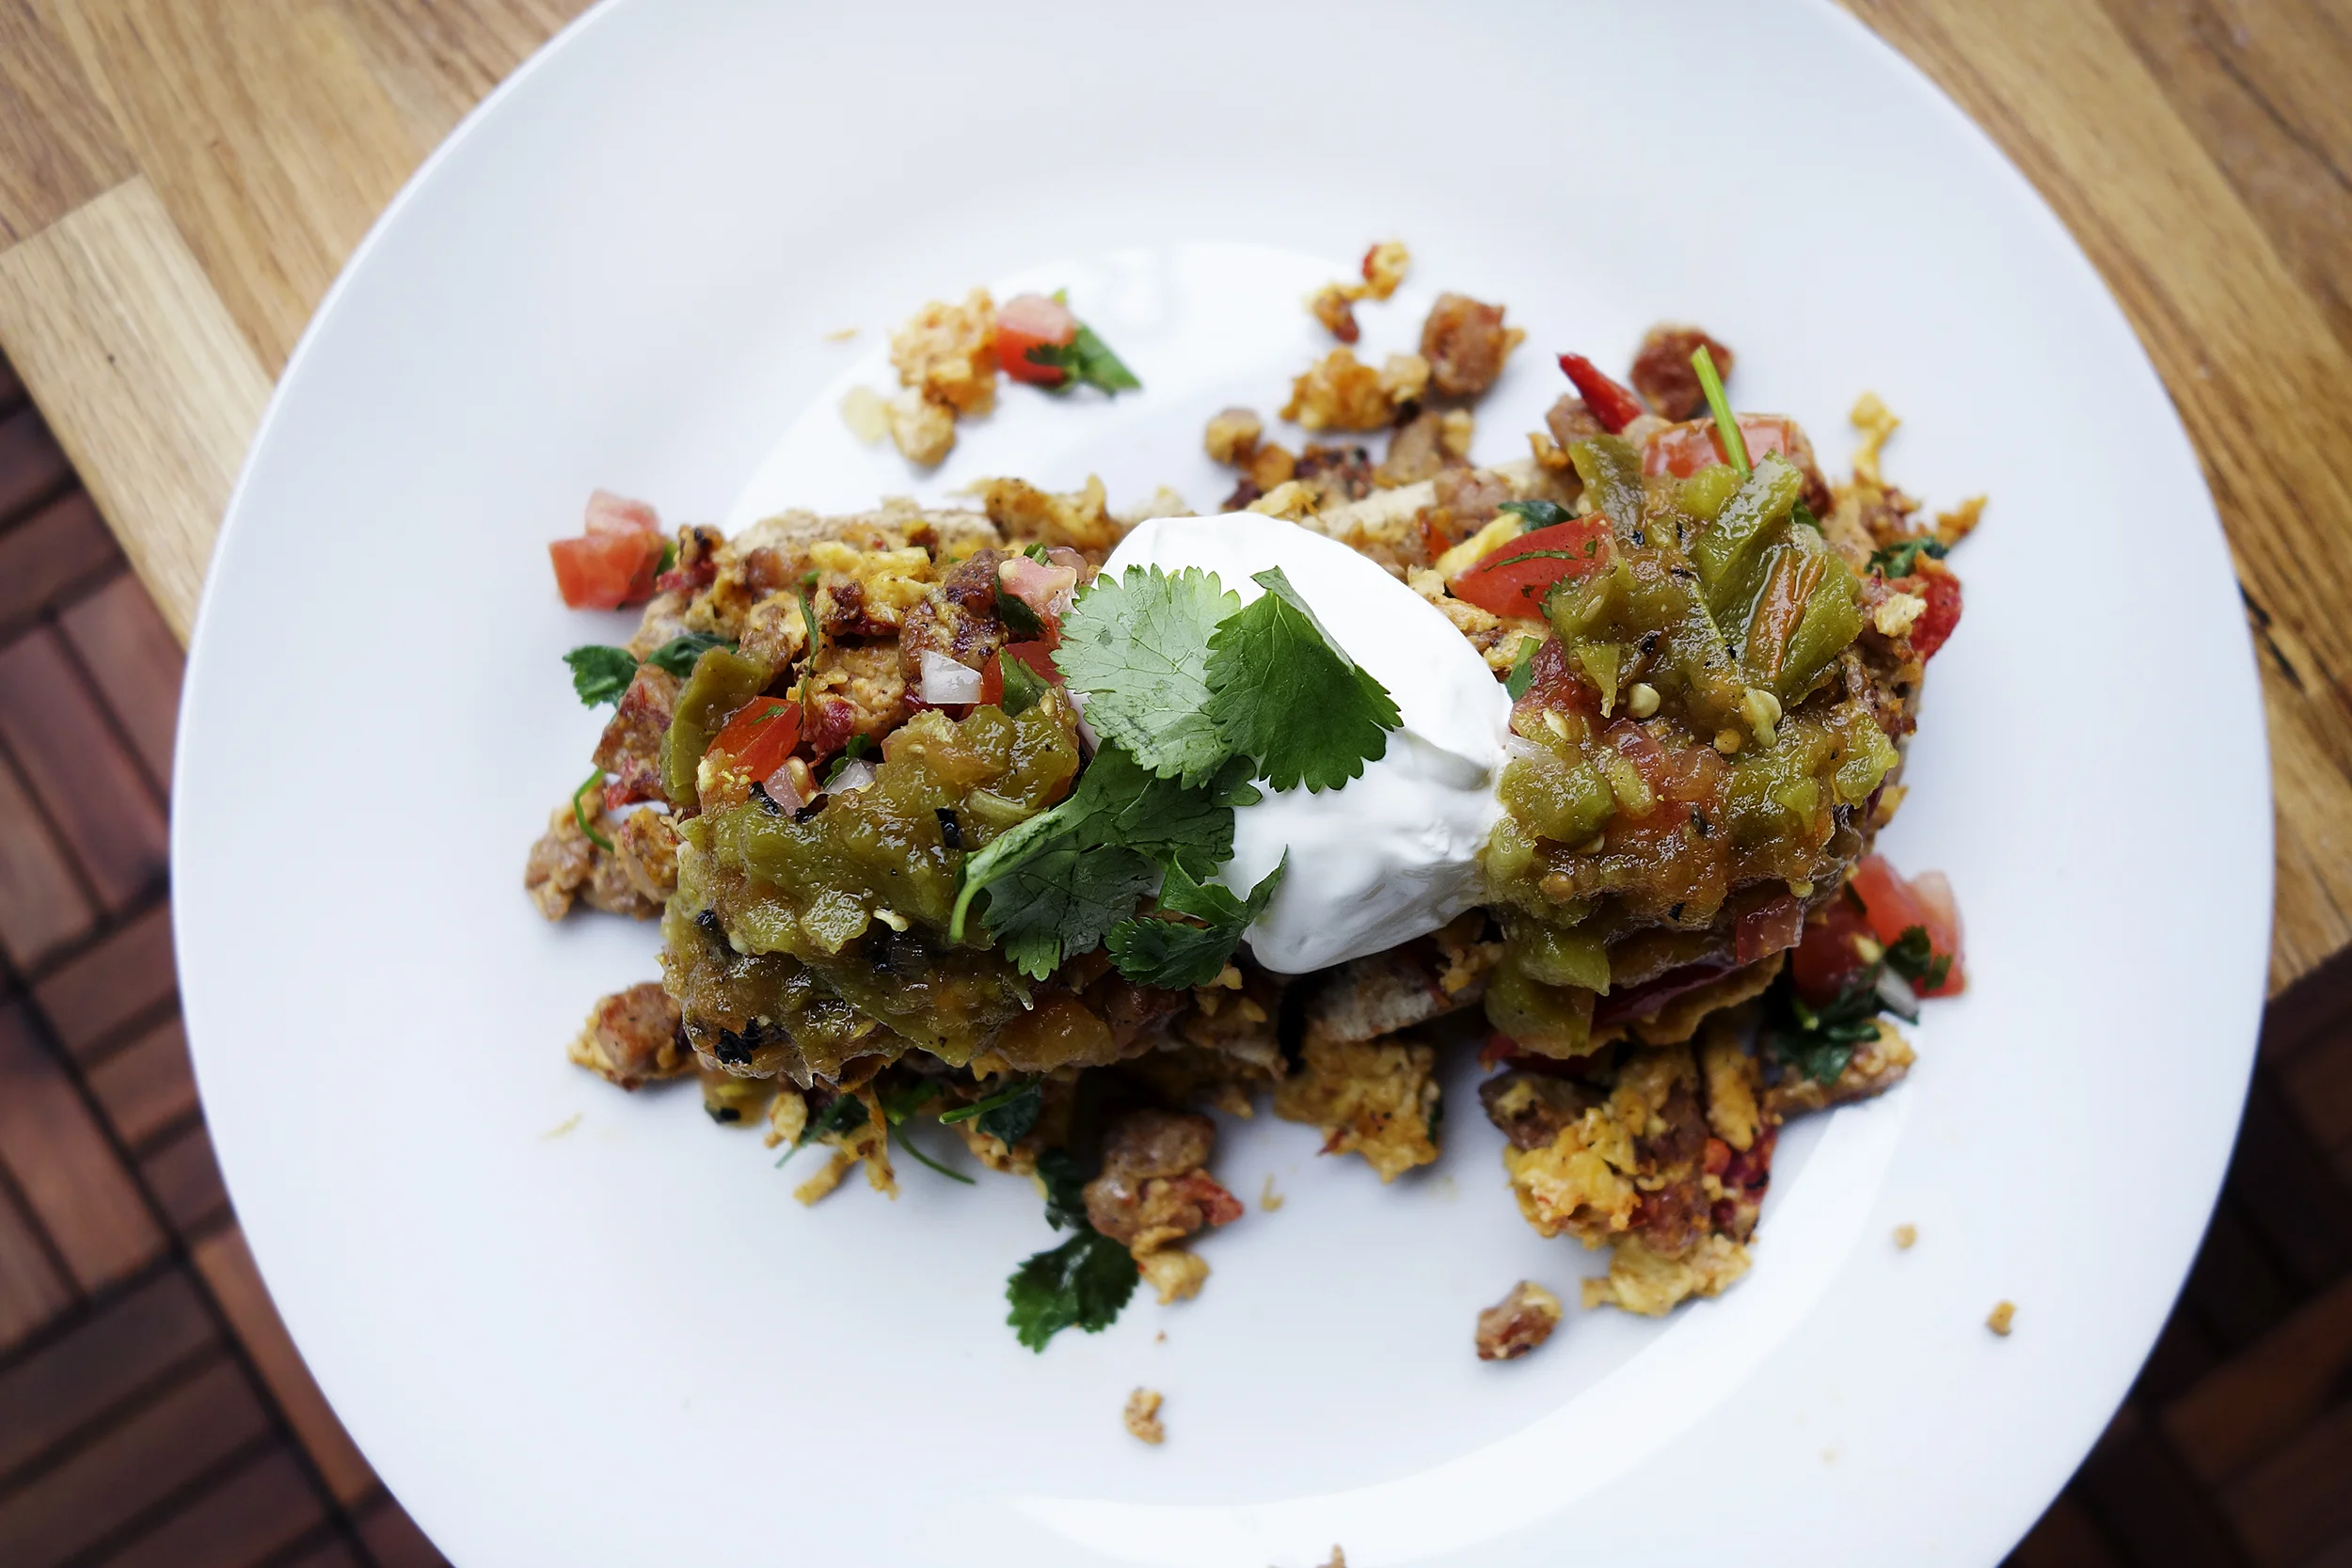
Start layering your plate. My combo was chips, beans, sauce, egg, sauce, and topped with a Louisiana green sauce. Cilantro was plucked and sprinkled as a garnish plus more on the side. If available, I would recommend adding queso fresco and avocado (WHICH I HAD AND FORGOT TO ADD).

Watch the full video here:

Enjoy!


Comment

Summer Brunch - Italy Inspired

Comment

Summer Brunch - Italy Inspired

I've been thinking about prosciutto lately. And when I say lately, I mean almost everyday, a few times a day. I recently hung out with a good friend of mine, Frances, who's also a total foodie freak like me. Trust me, there's a few out there that can really get down in a kitchen as well as knowing what types of food to order in restaurants. We were just hanging out the other day at a farmers market, drinking wine out of an emptied out Kern's pear juice can (don't ask) before starting our conversations about different food in different countries. One of them, was Italy.

I decided to make this brunch item after talking about my dreams of going. Who wouldn't want to go?

The recipe is simple though it may cost a little more than just your eggs and bacon.... toast.

Ingredients (Feeds 3):

  • 1 sheet of frozen puff pastry. The package normally comes with 2, save the other one for other uses. Thaw puff pastry for about 20 minutes.
  • 4-5 tablespoons of unsalted butter (optional)
  • 3 eggs cooked sunny side - or however you want your eggs. I use Happy Eggs.
  • 1 container of Belgioioso Burrata cheese - The container I got includes one large burrata almost the size of a softball. I got mines from Vons.
  • 1/4 pound of Prosciutto Di Parma - Got mine from Marcel Gourmet Market at the Grove in West Hollywood/Fairfax
  • 1 cup+ of baby arugula - feel free to add more.
  • Salt & Pepper

Directions

HELL YES (OPTIONAL) - ADDING EXTRA BUTTER TO YOUR PASTRY.

  1.  When the puff pastry is pliable, you will notice 3 folds on the dough. Hope them up so it's one sheet. In the middle fold, place about 1/2 a tablespoon interchangeably like checkers. Fold one sheet over to cover the butter, then place the remainder of the butter on the surface that doesn't have butter underneath, interchangeably as well. So if the sheet was transparent, it will kind of look like the butter is spread out evenly. Take the other flap and close it on top of the butter. Now it should look like how it was when you first took it out to thaw. 
  2. Get a rolling pin or a emptied out wine bottle like me and start rolling out your dough. I made a few folds as I rolled just like if you are to make puff pastry from scratch. I got about 10 folds or so before I started to roll it out into a rectangle (like a 12x10). I stuck this in the freezer while my oven heats up to 350 (I used my Breville Pro).
  3. When your oven is ready, line a baking pan with nonstick parchment paper. Lay out your chilled puff pastry and then sprinkle a light drizzle of salt.
  4. Bake for 30 minutes on 350. I ranked up to 400 degrees for an additional 3 minutes.
  5. If you don't add the additional butter, just follow the box instructions to cook. I would just roll it out, and make one fold to make my rectangle shape.

Always keep an eye on your oven. Try not to open your oven. Every oven is different so just make sure you check in at the 20-25 minute mark.

Plating

  1. I grabbed a wooded cutting board
  2. Spread 1/2 of the burrata onto the pastry
  3. Top with arugula, drizzle with a little olive oil. salt lightly with salt and pepper.
  4. Top with the rest of the burrata with dollops interchangeably.
  5. Top with your eggs the opposite way, interchangeably.
  6. Layer your Prosciutto

With a sharp knife, cut through in a rocking motion so you won't tear the pastry. You want to make clean cuts. Enjoy this with your beverage of choice. Had this with my legs kicked back, a cup of coffee, and just watched the birds chipper.

Enjoy!

Comment

Italian Sausage Scramble

Comment

Italian Sausage Scramble

It's been one of those re-purpose breakfast mornings where I don't want to go anywhere in particular, and I also don't want to shop for additional ingredients. So why not just work with what I have already. Actually I take everything back. I always try to re-purpose everything that I have so nothing goes to waste. I decided to make a quick brunch before heading out with these ingredients:

Recipe:

  • 2 Italian sausage links - These were frozen. I ran it under the water quickly so I could remove the casing. The links were still frozen, but I was still able to chop them into little pieces with some extra muscle.
  • 2 garlic cloves, minced
  • 1 roasted red pepper- from the jar. these were sliced into strips.
  • 4 eggs - I always use "Happy Eggs"
  • salt and pepper
  • red chili flakes
  • cilantro
  • garnish condiments: sour cream, roasted anaheim pepper salsa, pico de gallo
  • Left over wheat bread - toasted.

The sausage was cooked till charred bits were forming around the pork. Garlic and red chili flakes is then added and cooked out for about 30 seconds to 1 minute before the red bell peppers were added. This mixture is then cooked out for another minute.

The eggs are whisked and seasoned with salt and pepper before pouring on top of the sausage mixture. When the eggs are slowly coming together, toss in some ripped cilantro, about 2 tablespoons.

Lay out your toasted bread and top your scramble on top. Put a dollop of sour cream, and heapfulls of your salsa. Enjoy with a nice cup of Joe, and save the dishes for later.

Easy, hearty, beautiful and delicious. Make this for your family and friends in no time, no stress. Feel free to use other sausages or leave out condiments you don't have. It's always nice to have special items in your fridge or pantry like roasted peppers.

When you buy groceries, I recommend you taking a quick peek of what you have at home. You will be more inspired and creative when you are at the market that way.

Enjoy!


Comment

Standing rib roast

2 Comments

Standing rib roast

It's finally the season to make EVERYTHING that you want to eat. And I've been craving Prime Rib for the longest time, EVER.

But here is a little FYI on something about Prime Rib that I didn't know. For it to be called prime rib, the roast has to be Prime grade. Like. Ok. That will cost double the price of USDA choice. So with that said, we stuck with USDA choice. Though it's not as marbled and tender as prime, there are hacks that you can do, to make sure your roast is tender.

Going back to wanting a rib roast for quite some time. I've been eating all my steaks, literally with horseradish cream. That has been my new steak condiment and might be that way for the rest of my life. But who knows. If black truffles were affordable like garlic, that would definitely be my choice. But that's just taking it to another level. I'm not ready to quite commit to that level right now. 2016? Maybe.

So everywhere: Vons, Ralphs, Alerbertsons, were selling their USDA Choice rib roast for $6.99 a pound. I stuck with Vons just because it's one of my favorite markets. There was only one 9lb-almost 10lb rib roast left. Including myself, we have 6 people for dinner (most of my family lives in Canada). For 10lbs, I was being extremely optimistic. It's a challenge I was ready to accept. To devour this during the expand of this whole weekend. People that know me, thinks I can do it. And as a matter of fact, I could. But will I feel fantastic? Well it's Sunday and had leftover rib roast for the past 2 days and I feel great. Now all I have are the bones. And anyways, there were a group of people wanting the 10lb rib roast that we snatched. It was fate. And it was definitely my destiny to end 2015 with a meat hangover.

9.90lb standing rib roast.

It's pretty beautiful to be honest. I always loved a big hunk of meat, but this was just a little intimidating to handle. First things first. I got a few paper towels to wipe the beef dry. I then got a pairing knife, and made a few stabs on top of the fat (only) and stuck garlic cloves in. 1 whole head of garlic was stuck into the fat. Nothing on the flesh.

Before we go any further, here's the quick ingredients used.

  • 9 pounds of rib roast or prime rib
  • 2 whole heads of garlic.
    • 1 whole used for inserts
    • 1 whole chopped and minced for salt crust
  • 1 heap-full cup of Kosher salt
  • 1/3 cup of freshly grounded black pepper
  • 1/3 cup of dried parsley
  • Choice of oil to rub the top of your roast (I used Thrive Algae Oil because their smoke point goes up to 500).

After your meat has been inserted with garlic, combine your salt, black pepper, parsley, and that whole large head of minced garlic. Drizzle some oil on top and rub it all over the fat until it's perfectly coated. Now, pat down the salt crust:

Make sure to cover the roast as much as you can. DON'T worry about the sides or the bottom. Just worry about the fat cap. Preheat your oven to 475 and let this baby stay in for 1 hour. Don't worry if the roast gets a little smokey, there is a lot of black pepper and it's normal. And, try not to peep your roast by opening the oven. I know. I said try. I peeped like twice.

After an hour, lower your temperature to 300 degrees, and let your rib roast go for another 1 hour and 10 minutes.

The high temperature scorches the exterior of the roast which helps the juices stay in. The low temperature cooks the meat, slowly, causing it to become tender and juicy. Let this stand on a cutting board for about 20 minutes or so before cutting into it. Just cover this with aluminum foil. It's a large roast, so you really want to let it rest for the juices to stay inside.

The salt crust is removed before serving (do NOT forget to remove this). And the ribs are also removed and put off to the side for a snack. You can easily stick the bones under a 500 degree oven with a quick spice rub. ugh. The bones though, peeled off from the meat because it was so tender.

End piece

This cut was the end. I did the honors to eat this piece while everyone had the center. As you can see, the end pieces are borderline medium. And I love how pieces of garlic pops through the roast from the insertions.

This bad boy was medium rare. So tender and full of flavor. No salt was needed for this. We just drizzled this with Au Jus which was made from the scrapings on the pan.

Au Jus

Pour out all the fat from the pan into a jar, let cool before dispose. In the pan, I poured in some beef stock about 3/4 of 1 carton. Crack a little more black pepper, and make a quick corn starch slurry to thicken the sauce just a tad.

A quick simple mash and corn was all you need. You don't want to take away the main with sides, especially this beauty. I was extremely impressed by how tender the beef was, and how the salt crust really kept the juices sealed as well as penetrating through the meat.

Leftovers?

Homemade Hashbrowns and over easy eggs (The Happy Eggs).

You be the judge! And always get a roast more than you think you will need.

Happy Holidays and stay tuned for more Christmas feasts.

Daisy


2 Comments

Egg "Muffins" and Hashbrowns

Comment

Egg "Muffins" and Hashbrowns

Happy Sunday folks! I've been thinking that it's been a bit since I've made breakfast. Everything has been great in my life, and time has finally slowed down a little for me to catch a break. I've been extremely excited for the Holidays. It gives me every reason to eat whatever I want. I already do... BUT, it's an excuse to do so, and no F*cks will be given during this time. Really, but not really.

I've decided to make egg muffins after seeing so many posts about it. It's super simple. Even for a dude.

Recipe (Makes 6 servings):

  • 1 dozen eggs. I use "Happy Eggs".
  • 1 pack of Farmers John Sausage. You know, the ones that sells for $1-$2.
  • A flew florets of broccoli, about 1 heapfull tablespoon in each muffin.
  • 6 strips of bacon
  • 1/3 cup of your choice of dairy.

Equipment:

  • Your oven, preheated at 350
  • 1 muffin/cupcake tin with 12 slots (standard). Greased (very important to spray your tin).

The bacon is cut into little pieces then cooked till crispy. These are removed onto a paper towel to soak out the grease. The sausage is broken apart in the pan as it cooks to little chunks. The broccoli will be placed on the bottom of each hole, then the sausage. Whisk all the eggs together with your dairy of choice. Don't forget to salt and pepper your eggs.

Ladle your eggs in each of your muffins. Lastly, top with the bacon, and bake in your oven for about 20 minutes. Make sure to let your eggs rest about a minute or 2 before removing them from the tin.

HASHBROWNS!

1 large russet potato is all you need to serve 2 people. I simply scrubbed the potato until running water before grating. I then rinsed the potato a few times until the starchy residue went away, and the water becomes clearer. My grated potatoes were just hanging out in salted water while I was cooking my egg muffins.

The potatoes were rinsed off again, and strained to drain off any excess water. In a nonstick pan, I added about 4 tablespoons of oil. You are basically going to pan fry these babies. I put the potatoes in the pan, gave it a few tosses for it to be evenly coated with the oil, seasoned again with salt and a little pepper with dash of garlic powder. Now on high, I wait for the potatoes to get crispy on the bottom. You will notice by crowding the potatoes will also start steaming. This is fine as it will cook the potatoes more thoroughly before browning. If you are a bit intimidated, feel free to set your temperature to medium high. I adjust the temperature as I go. Once the potatoes are turning golden, I flipped the hash, and then added a few more table spoons of oil to make sure both sides will be golden.

Serve with Ketchup and Sriracha!

So easy and so fun! You can put whatever you want in these egg muffins. Whatever leftovers you have will be great in this.

Enjoy!

Daisy


Comment